Easy AI Chatbot Documentation
Getting Started
- Quickstart Guide
- Installation & Activation
- Uninstalling
- Getting Your API Key
- Enable Floating Widget
- Basic Context
- Say Hello!
Admin Walkthrough
- Settings Tab
- Design Tab
- Training Tab
- Training Tools Tab
- Shortcodes Tab
- Conversations Tab
- Danger Zone
Reference & Policy
(coming soon)
Quickstart Guide
Get your AI chatbot live on your website in about five minutes. No third-party API keys, no coding, just bot building made simple!
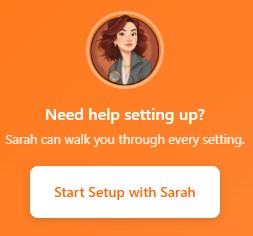 PRO TIP! Once the plugin is installed, you can engage with Sarah, our support bot by clicking the Get Started With Sarah button on the Get Started tab or by clicking any orange ? found throughout the plugin to ask her a question. You may also reach out to our team for support here.
Note: Our plugin is available for free on WordPress.org AND with expanded capabilities, larger message limits, more advanced LLM access and more on our website as a Pro version. Both versions are free to install and use.
Users may upgraded to additional tiers of service in the pro version only.
We recommend grabbing the pro version if you haven't already!
Step 1 — Install the plugin
FREE Version Installation: In your WordPress admin, go to Plugins → Add New and search for "Easy AI Chatbot." Click Install Now, then Activate.
PRO Version Installation:
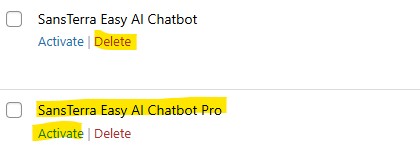
Click here to download a .zip file of our plugin. Save to your computer and do not unzip the file. Browse to plugins and choose "Add Plugin" then "Upload Plugin". Select the .zip file you saved, click Install Now, then Activate. Do not activate both the Free and Pro versions at the same time — if you have the free version installed, deactivate it first before activating Pro.
Upgrading to Pro from FREE:
Follow the download and installation instructions above for our Pro version. The Free version should deactivate automatically but if it doesn't, simply deactivate the free version and activate the pro version. You may delete the free version without issue and the pro version will inherit all free settings:
Uninstalling:
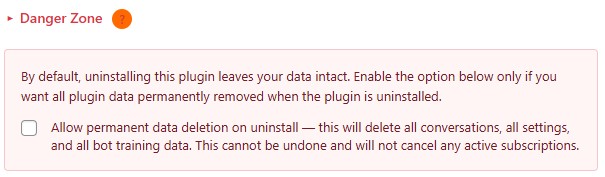
You can uninstall and reinstall without losing any settings. IF you wish to completely remove the software from your WordPress site, navigate to the Settings Tab, scroll to the bottom and open the Danger Zone section and tick the "Allow Permanent Data Deletion" option, click save in the top right corner, then uninstall normally.
Step 2 — Request your API key
After activating the plugin, go to Easy AI Chatbot in your admin sidebar. You'll land on the Get Started tab. Click the "Request API Key" button, fill in your name and email, and submit. Your API key will appear in the field automatically.
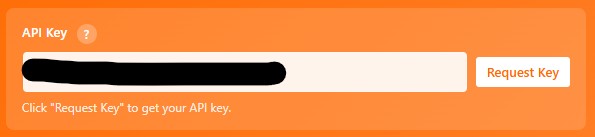
Note! By requesting an Easy AI Chatbot API key you are accepting our Terms of Service and Privacy Policy.
Step 3 — Enable the floating widget and configure notifications
Click the Settings tab. Check the "Enable Floating Widget" box and hit Save Changes. Your chatbot is now live on every page of your site.

Step 4 — Give your bot minimal context to start
Click the Training tab. If Sarah hasn't done this for you already, fill in the Business Summary field with a brief description of your business — what you do, who you serve, what makes you different. This is the foundation of how your bot answers questions. Hit Save Changes.
Step 5 — Say hello
Visit your site and click the chat bubble in the corner. Type a question and see your bot respond. That's it — you're live.
With even this minimal context, your bot will use your built-in WordPress search and business information to help users find content within you website and follow its default directive of connecting users with your team.
What's next?
From here you can go much deeper on customization with your brand colors and branding in the Design tab, add personality rules in the Training tab, and review conversations in the Conversations tab. Browse the full documentation below for everything the plugin can do.
PRO TIP! You don't have to activate the bot on your site to test. You have a "Test Bot" button in the top-right corner of your Easy AI Chatbot admin pages that links to support, allows you to reset you conversation in your live site AND a "Test Bot" link that emulates our floating widget for fast testing.

NOTE! Test bot interactions do not count against your message usage.
Settings Tab
The Settings tab is where you configure the core behavior of your chatbot — what it's called, how it greets visitors, notification preferences, and the consent screen.
Enable Floating Widget — Toggles the floating chat bubble on or off across your entire site. When disabled, the chatbot is only accessible through shortcodes (Starter plan and above). This is useful if you want to finish setup before going live.
Lead Notification Email — Enter one or more email addresses (comma-separated) to receive an email whenever a visitor submits their contact details through the chat widget. Leave blank to disable.
Conversation Notification Email — Enter an email address to receive a copy of every user message and bot reply in real time. This is separate from lead notifications — it sends you the full back-and-forth as it happens. Leave blank to disable.
Bot Name — The name your chatbot displays in the widget header and uses when introducing itself. Examples: "Sarah," "Alex," "Acme Support," or whatever fits your brand.
Tagline — A short line of text that appears below the bot name in the widget header. Common uses include "I'm always on ;)" or "Usually responds instantly." Keep it brief.
Greeting — The initial message visitors see when they first open the chat widget. This is your bot's first impression — make it welcoming and set expectations for what the bot can help with.
Quick Questions — Comma-separated list of questions that appear as clickable buttons below the greeting. These give visitors an easy starting point instead of a blank text field. Example: "I need parts, I need service, I want pricing"
Tip Text — The text that appears in the small prompt bubble next to the chat button before a visitor opens the widget. Something like "Got a question?" works well. This is the nudge that encourages visitors to click.
Consent Screen — Toggle this on to show a one-time consent/disclaimer notice before visitors can start chatting. Recommended for GDPR compliance and AI disclosure. Once a visitor accepts, the preference is stored in their browser and the screen won't appear again.
When enabled, three additional fields appear:
- Consent Message — The disclaimer text shown to visitors. Keep it concise and clear.
- Privacy Policy Link Text — The clickable text for your privacy policy link (e.g., "Privacy Policy"). Leave the URL field blank to hide the link entirely.
- Privacy Policy URL — The full URL to your privacy policy page.
Design Tab
The Design tab controls the visual appearance of your chat widget. Changes here apply to both the floating widget and embedded shortcode widgets.
Chat Avatar — Upload a square image (200×200px recommended) through the WordPress media library. This image appears as the chat bubble icon on the floating widget and the header icon in the chat window. Click "Remove Avatar" to reset to the default.
Avatar Display — Choose how your avatar is rendered:
- Circle — Crops the image into a circle. Best for headshots or round logos.
- Original — Displays the image as-is with no clipping. Great for transparent PNGs, custom mascots, or logos that shouldn't be cropped.
Primary Color — Your main brand color. Used for the chat bubble gradient, send button, user message bubbles, and header background.
Secondary Color — Used alongside the primary color to create gradients on the chat bubble, header, and user messages. Set this to the same value as your primary color if you want a flat, non-gradient look.
Background Color — The background of the chat window and message area.
Text Color — The default text color for bot messages and interface labels.
Position — Places the floating widget on the bottom-right or bottom-left corner of your site.
Show Tip Bubble — Enables a small prompt bubble (set under the Settings tab as "Tip Text") that appears next to the chat button before a visitor opens the widget. Visitors can dismiss it by clicking the X.
Custom CSS
At the bottom of the Design tab, you'll find pre-built CSS templates for both the floating widget and the embedded widget. These templates are pre-populated with your current color values and include every available CSS class. To use them:
- Click "Copy to Clipboard" on the template you want.
- Go to Appearance → Customize → Additional CSS in your WordPress admin.
- Paste the CSS and modify any values you'd like to override.
This gives you full control over spacing, fonts, border radius, shadows, and any other styling the color pickers don't cover.
Training Tab
The Training tab is where you teach your chatbot about your business. Everything here is sent as context to the AI when it generates responses, so the more specific and accurate you are, the better your bot performs.
Each text field shows a live word counter and your current plan's word limit. If you exceed the limit, the plugin will prevent saving and show you the actual word count so you know how much to trim.
Business Name — Your company or organization name. This is used by the AI for context when referring to your business in conversation. Defaults to your WordPress site title.
Business Summary — A brief description of what your business does, who you serve, and what sets you apart. Think of this as the elevator pitch your bot uses to understand your company. Defaults to your WordPress site tagline. This is the single most important field for giving your bot useful context.
Personality & Purpose — Define how your bot sounds and what its job is. This is where you set the tone (professional, casual, friendly) and explain the bot's primary role. For example: "You are a friendly customer service assistant for Acme Tools. You help customers find the right equipment and answer questions about availability and specs. Keep responses concise and helpful."
Rules — Specific instructions the AI must follow. These are hard boundaries and behavioral guidelines. Examples: "Never share pricing without explaining value first," "Always ask for contact info before scheduling," "If you don't know something, offer to connect them with a human," "Keep responses under 3 sentences when possible."
Knowledge Base — This is the big one. Enter the detailed information your bot should know — product details, FAQs, service descriptions, policies, hours, anything a visitor might ask about. We recommend using markdown format to organize your content with headers, lists, and bold text, as the AI reads the structure to better understand relationships between topics. The Knowledge Base has its own word limit separate from the other training fields:
| Plan | Training Fields (each) | Knowledge Base |
|---|---|---|
| Free | 100 words | 500 words |
| Starter | 200 words | 1,000 words |
| Pro | 300 words | 2,000 words |
| Business | 500 words | 5,000 words |
Tips for effective training:
- Be specific. "We sell industrial equipment" is less useful than "We sell bucket trucks, digger derricks, and aerial lifts for utility and telecom companies."
- Write in the same language you'd want the bot to use. If you write casually, the bot responds casually.
- Put your most frequently asked questions and their answers in the Knowledge Base. The bot will draw from them directly.
- Update your training content as your business changes. The bot only knows what you tell it.
Content Sources Tab
The Content Sources tab lets you connect your AI chatbot to live data — your WordPress content, specific post types, or even external APIs. Each source you configure becomes a real-time search tool your AI can use during conversations, so it always has accurate, up-to-date answers instead of relying only on the static Knowledge Base you wrote in the Training tab.
WordPress Search — Built In
Every installation comes with a built-in WordPress Search tool that works immediately with no configuration. This is what your bot uses by default to find content across your site — pages, posts, products, and anything else WordPress indexes. You can toggle it on or off and customize the instructions that tell your AI when to use it. For most sites, the default instructions work well out of the box.
The Source URL shown at the bottom of the WordPress Search section is the REST API endpoint your AI calls behind the scenes. You don't need to do anything with it unless you're doing advanced integrations.
Custom Content Sources (Endpoint Slots)
Beyond the built-in WordPress Search, you can set up additional content sources. These are especially useful when you want your bot to search a specific subset of your content — like only WooCommerce products, only blog posts in a certain category, or data from an external system entirely.
Each source gets its own card in the interface. To set one up, toggle it on and configure the following:
Name — A short, descriptive label like "Product Catalog" or "Support Articles." This helps you identify the source and is used internally by the AI.
Source Type — Choose from three options:
"Custom Search" is the recommended option for most users. It searches your WordPress content with filtering controls so you can narrow results to specific post types, categories, tags, or even individual posts. You can also include custom fields (ACF or standard WordPress meta) in the search results by adding meta field keys. This is ideal for product catalogs, knowledge bases, blog archives, or any structured WordPress content.
"WordPress Core" uses the built-in WordPress REST API endpoints directly. You pick from a dropdown — Posts, Pages, Categories, Tags, Users, Comments, or Media. This is best when you need standard WordPress data without custom filtering.
"External Source" lets you connect to any third-party API or service by entering its URL. This is reserved for Business plan users and is designed for connecting to external databases, microservices, or custom backend systems.
Content Types (Custom Search only) — Check which post types to include: posts, pages, products, or any custom post types registered on your site. Leave all unchecked to search everything.
Filter by Category / Tag (Custom Search only) — Narrow results by taxonomy. You can select specific categories, tags, or custom taxonomy terms to limit what the source returns.
Specific Post IDs (Custom Search only) — Lock the source to only return specific posts by their IDs. Useful for curated collections, featured items, or hand-picked FAQ entries.
Meta Fields (Custom Search only) — Include custom field data in search results. Type a field key and press Enter to add it, or use the Discover button to see what fields exist in your database. This is particularly useful for ACF-powered sites with rich metadata like pricing, specs, or availability.
Result Limit — The maximum number of results the endpoint returns per search. Your plan determines the ceiling.
Instructions — This is the prompt that tells your AI when to use this source. Write it like a rule: "Use this tool when the user asks about products, pricing, or inventory." Good instructions prevent the AI from searching the wrong source and help it pick the right tool for each question.
Source URL — Shown at the bottom of each source card. This is the REST API endpoint the AI calls. You don't need to copy or use this unless you're building custom integrations.
Plan Limits
The number of content sources available depends on your plan:
| Plan | Content Sources | Max Results per Search | External URLs |
|---|---|---|---|
| Free | 1 | 2 | No |
| Starter | 1 | 50 | No |
| Pro | 3 | 100 | No |
| Business | 5 | 500 | Yes |
All plans include the built-in WordPress Search at no extra cost — the limits above apply to additional custom sources only.
Troubleshooting
If your endpoint returns a 404 "No route found" error (especially when it works while logged in but not for external requests), try these steps in order: First, go to Settings → Permalinks and click Save Changes — this flushes WordPress rewrite rules. Second, clear all caches including your hosting cache, any caching plugin, and Cloudflare if you use it. Third, check security plugins like Wordfence or iThemes Security, which sometimes block REST API access for unauthenticated requests. If the issue persists, add /wp-json/easy-ai-chatbot/* to your cache exclusion rules.
Conversations Tab
The Conversations tab is your window into every interaction your chatbot has with visitors. It logs all messages locally in your WordPress database — nothing is stored externally — so you can review what people are asking, how your bot is responding, and where it might need better training.
Statistics Dashboard
At the top of the tab you'll see a summary of your chatbot's activity: total conversations, total messages, conversations in the last 24 hours and last 7 days, conversations with errors, average messages per conversation, and your conversation database size. This gives you a quick pulse check without digging into individual threads.
Conversation List
Below the stats, you'll find a list of all recorded conversations. Each row shows the session ID, widget type (floating, embedded, or admin helper), message count, start time, last activity timestamp, and an error indicator if something went wrong during that session.
You can filter the list by widget type using the dropdown, toggle an "errors only" view to surface problem conversations quickly, or search by session ID if you're looking for a specific interaction. The list is paginated so it stays manageable even with high traffic.
Each conversation has two actions: "View" opens a detail modal with the full message history, and "Delete" removes that conversation and all its messages from your database.
Conversation Detail View
When you click View on a conversation, a modal opens showing the full session metadata and complete message history with timestamps. Messages are color-coded by type — blue for user messages, gray for bot responses, red for errors, and orange for system messages — so you can scan a conversation quickly and spot issues at a glance. The bot's configured name appears in the header rather than a generic label.
Data Retention & Privacy
At the bottom of the tab you'll find purge controls for managing conversation data. This is important for GDPR compliance and keeping your database lean. You can delete conversations older than a set period — 7, 14, 30, 60, or 90 days — with a single click, or purge all conversations entirely if you need a clean slate. Both actions require confirmation before anything is deleted.
The plugin also supports automatic purging via a daily WordPress cron job. When configured, it runs in the background and removes conversations older than your chosen retention period without any manual intervention.
Tips for using conversations effectively:
Review your conversations regularly, especially in the first few weeks after launching your bot. Look for patterns — questions the bot struggles with, topics where it gives incomplete answers, or places where visitors drop off. Use what you find to improve your Knowledge Base and Rules in the Training tab. The conversations you review are the single best source of insight for making your bot smarter over time.
Danger Zone
The Danger Zone is a collapsible section at the bottom of the Settings tab. It controls what happens when you uninstall the plugin.
By default, uninstalling Easy AI Chatbot leaves all your settings, conversation history, and database tables intact. This means you can deactivate and reactivate — or even delete and reinstall — without losing anything. Your bot name, training content, design choices, API key, and all logged conversations will still be there when you come back.
If you want a complete removal — wiping all plugin data from your WordPress site permanently — you need to opt in first. Open the Danger Zone section, check the "Allow Permanent Data Deletion" box, and click Save Changes in the top right corner. Once that's saved, uninstalling the plugin through WordPress will remove everything: all plugin settings and options, conversation and message database tables, scheduled cron jobs, and any other data the plugin stored.
This is irreversible. Once you uninstall with this option enabled, there is no way to recover your settings or conversation history. Only enable it if you're certain you want a clean slate.
If you're just troubleshooting or switching between the Free and Pro versions, leave this unchecked. Your data will carry over safely.
Privacy & Data Flow
Easy AI Chatbot is designed so that your conversation data stays on your WordPress site. This section explains what data is collected, where it goes, and what controls you have.
What's stored in your WordPress database
When a visitor uses the chat widget, the following data is logged locally in your WordPress database: the full chat message history (both visitor messages and bot responses), the visitor's IP address, the visitor's browser user agent, a session identifier, and conversation metadata like widget type, timestamps, and error status. All of this stays on your server. Easy AI Chatbot does not copy or sync this data to any external database.
What's transmitted externally
When a visitor sends a message, the plugin transmits the message text to the Easy AI Chatbot API for AI processing. Along with the message, the request includes the session identifier, your bot's configuration (name, personality, rules, and knowledge base content), and any active Content Source tool definitions so the AI can search your site in real time.
This data is used solely to generate a response. Message text and payloads are not retained on Easy AI Chatbot servers after the response is delivered. Nothing is stored, logged, or used for training.
The Easy AI Chatbot API forwards your message to a third-party AI provider to generate the response. That provider processes the message under its own data handling policies, which do not include using your data for model training. Easy AI Chatbot may change AI providers over time to improve quality and performance.
What's stored in the visitor's browser
The plugin stores a session identifier in the visitor's browser using localStorage (not cookies). This is used to maintain conversation continuity so a visitor can close and reopen the widget without losing their thread. No personal information is stored in localStorage — only the session ID.
Consent screen
The plugin includes a built-in consent screen you can enable in the Settings tab. When turned on, visitors see a one-time disclaimer before they can start chatting. You control the message text and can link to your own privacy policy. Once a visitor accepts, the preference is saved in their browser and the screen won't appear again. This is recommended for GDPR compliance and AI disclosure requirements.
WordPress privacy policy integration
When the plugin is active, it automatically registers suggested privacy policy content in your WordPress Privacy Policy editor (under Settings → Privacy). You can review this suggested text and include it in your site's privacy policy with one click.
Data retention and deletion
You have full control over how long conversation data is kept. From the Conversations tab, you can manually purge conversations older than 7, 14, 30, 60, or 90 days, or wipe all conversations entirely. You can also enable automatic purging, which runs daily via a WordPress cron job and removes conversations older than your chosen retention period. If you uninstall the plugin with the Danger Zone option enabled, all data — including conversation tables — is permanently removed from your database.
Summary
Your conversation logs live in your WordPress database and nowhere else. Message text passes through the Easy AI Chatbot API and a third-party AI provider to generate responses, but is not stored by either service after delivery. You control consent, retention, and deletion from within the plugin.
For full details, see the Easy AI Chatbot Privacy Policy and Terms of Service.
FAQs
Troubleshooting
The chat widget isn't appearing on my site
First, make sure you've checked "Enable Floating Widget" in the Settings tab and clicked Save Changes. If it's enabled and still not showing, check for JavaScript errors in your browser's developer console (right-click → Inspect → Console tab). Common causes include caching plugins serving a stale version of the page, or a JavaScript conflict with another plugin. Clear your site cache, clear your browser cache, and do a hard refresh (Ctrl+Shift+R). If you're using a shortcode instead of the floating widget, make sure you're on a Starter plan or above — shortcodes aren't available on the Free plan.
The bot isn't responding or shows a connection error
This usually means the plugin can't reach the Easy AI Chatbot API. Check that your API key is entered correctly in the Get Started tab. If it was working before and suddenly stopped, the issue is likely temporary — wait a moment and try again. If the problem persists, visit our support page to check service status or contact our team.
The bot gives wrong or generic answers
This almost always means the bot needs better training. Start by reviewing recent conversations in the Conversations tab to see where it's falling short. Then improve your Knowledge Base in the Training tab — add the specific information visitors are asking about. Be detailed and specific: "We sell bucket trucks, digger derricks, and aerial lifts" is far more useful than "We sell industrial equipment." Also check that your built-in WordPress Search is enabled in the Content Sources tab, as this lets the bot search your site content in real time.
My Content Source endpoint returns a 404 error
If the endpoint works when you're logged into WordPress but fails for external requests, follow these steps in order. Go to Settings → Permalinks in your WordPress admin and click Save Changes — this flushes rewrite rules even without making changes. Then clear all caches: your hosting cache, any caching plugin (WP Super Cache, W3 Total Cache, LiteSpeed, etc.), and Cloudflare if you use it. If it still fails, check whether a security plugin like Wordfence or iThemes Security is blocking REST API access for unauthenticated users. As a last resort, add /wp-json/easy-ai-chatbot/* to your cache exclusion rules.
The bot seems to have lost its memory mid-conversation
The bot maintains conversation context using a session identifier stored in the visitor's browser via localStorage. If a visitor clears their browser data, switches browsers, or uses private/incognito mode, the session resets and the bot starts fresh. This is normal behavior. On your end, if your server or backend restarts, in-memory conversation context may also be cleared — the bot will continue working but won't remember what was said before the restart.
I want to start a fresh conversation for testing
In the admin area, click the "Test Bot" link in the top bar — this opens a test widget that doesn't count against your message usage. You can also use the "Reset Conversation" button in the admin top bar to clear the live session. On the front end, append ?reset=1 to any page URL on your site to start a clean session.
Changes I made aren't showing up
After saving changes in any tab, clear your site cache. This is especially important for Content Source changes, which rely on REST API endpoints that may be cached by your hosting provider or a caching plugin. If you're on WP Engine, go to the WP Engine menu and Purge All Caches. For other hosts, clear whatever caching layer you have. Also do a hard refresh in your browser to make sure you're not seeing a cached version of the page.
The bot stopped responding and says it's "out for lunch"
You've hit your monthly message limit. The bot displays a friendly unavailable message to visitors rather than failing silently. You can check your current usage in the Conversations tab. Your limit resets automatically at the start of each billing month, or you can upgrade to a higher tier for more messages.
Database tables are missing
If the Conversations tab shows a warning about missing database tables, the tables weren't created during plugin activation. You can fix this by deactivating and reactivating the plugin, or by clicking the "Create Database Tables Now" button that appears in the warning. This won't affect your settings or other data.
If you're experiencing an issue not covered here, contact our support team or click any orange ? button in the plugin to ask Sarah for help.